Search This Blog

Saturday, January 31, 2015

Transplanting endive and head lettuce - 3rd row almost full

I transplanted a couple flats of endive and 1 flat of head lettuce in the garden today.    The 3rd flora- flow row is almost full.   Here's some pictures of the endive, lettuce, row almost full.


Rebuilding the Orchard

My orchard need to have 75 fruit or nut trees to keep my agriculture water meter which gives me a break on the water cost.    I am missing 4 trees because they have died.   I planted the first replacement tree today.  I chose a Anna Apple tree because it has a low chill requirement.

Anna Apple Tree is an Israeli selection with a remarkably low chill requirement. It is large and has light greenish-yellow skin with a slight red blush. The Anna Apple fruit is sweet, slightly tart, crisp with a creamy white flesh. Anna Apples are a good southern choice for fresh eating, apple sauce, or homemade pies. The trees produce at an early age and the fruit stores very well. Anna Apple trees need only 200-300 chill hours to produce delicious apple that ripen in late June. Pollinator required. Ein Shemer and Dorsett Golden are perfect pollinators for the Anna Apple tree.
Grows in zones: 6 - 9

I will need to plant another - tree as a pollinator.    

I dug a hole - and mixed some compost in with the soil - then covered the roots - making sure that I didn't plant the tree any deeper than it was originally planted making sure the the bud graft is above the soil.


Tuesday, January 27, 2015

3rd row of vegetables!

I started planting my 3rd row of vegetables in the new installed flora flow all in one mat.   I planted some gypsy broccoli, escarole lettuce, and northern lights swiss chard.     I am covering this row also with the insect netting.  I worked so hard to start they seedlings and I am afraid if I don't protect them, the rabbits will wipe out some hard work in one night.   By the amount of rabbit droppings that I see all over the place, there must be a quite a few.  Here is a picture of the row that is about a 3rd planted. I need to build some more netting supports so I can continue planting down the row.


How to Install and Flora Flow all in one Mat

I installed another flora - flow all in one mat.  Its a plastic mulch with pre-punched holes for plants and a low pressure drip line for irrigation installed in the mulch/mat.
Here are the step by step instructions with picture.

First - Prepare the soil.    The soil should be tilled if at all possible so its nice and soft.    The watering and planting area of the mat is 3 feet wide, so you need to build up the planting area into a mound.   this will allow the water to run down the sides of the mound so all plants will get water.   It will look like a long fresh grave when your finished.


Here is a picture of the mat as it arrived.  


Here is a picture of the bottom side of the mat showing the drip line that runs down the middle of the mat.   The Mat is 50 feet long which is how long I made the rows.   I received an email that Flora flow is creating a mat with multiple drip lines down the length of the mat.   I will try one as soon as they are available.


Here is the other side of the mat.  This is the side that will be facing up when installed.  The white stripe down the middle is where the drip line is located so you won't cut it when planting.
Here is the mat all rolled out down the entire row.  


Here is the end with the drip line sticking out.  This is where you will attach the water supply.   


Here is the mat with both side unfolded to the full width of 4 feet.

The mat is 4 foot wide, but the growing area is 3 foot wide.  The extra half foot on each side is covered with dirt to hold the mat down so the win doesn't blow it away.  The line that is covered with dirt is clearly marked on the mat which makes it very easy.


Here is the sides of the mat covered with dirt.  You have to make sure that its completely covered as if its a windy day and there is a spot for wind to get under, it will make it start flapping in the wind which will damage the plants or worse yet,  blow the mat away - ripping all the plants out in the process.

Here is the mat completely installed with both sides covered with dirt.   You can see the mound like appearance.

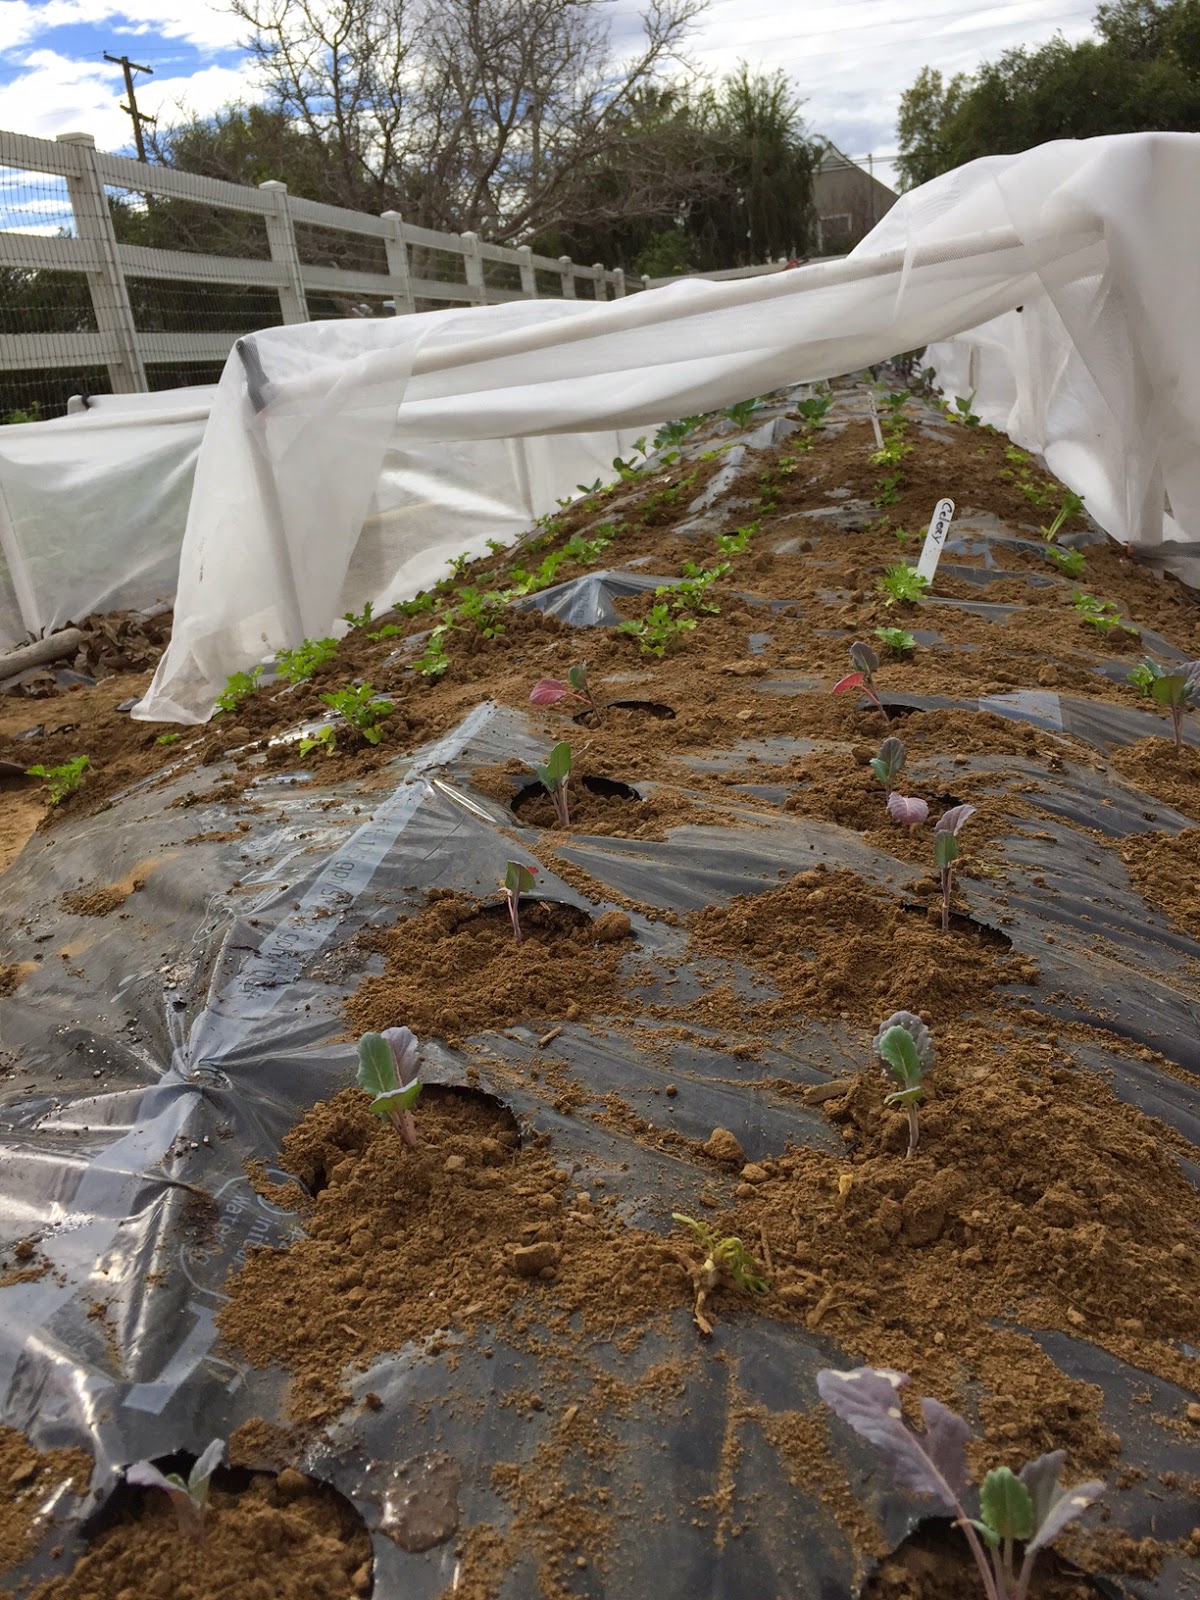
The mat has 3 holes on each side of the drip line - in rows running down the entire length.   You can plant all 3 holes or only one or two - depending on how big the plants will grow.   For example, when I plant cabbage,  I plant the top of bottom -  leaving the middle hole intact so no weeds will grow out of it.

Here is the mat with broccoli plants in the holes.  I will put a little dirt around the plant completely covering the hole - so no wind can get under the hole causing the mat to lift up.   There will be some dirt on the top of the mat around the holes, but the rain will eventually wash it down the sides and into the holes.

Gopher Hunter

I regularly take our Corgi - Lucy out to the farm to explore, fun around, and get exercise while I am working.   She was busy all afternoon in another part of the corral where I am growing vegetables.  I decided to take a look at what she was so interested in.   She was busy trying to dig up a pocket gopher that she must have chased down a hole.  I was out there 4 hours and she spent 90% of the time at that gopher hole.  Here are some pictures of Lucy digging and sniffing down the hole.


Transplanting Celery and Broccoli!

I finished off the 2nd row with some celery and broccoli seedlings.   The celery is Utah tall celery and the broccoli is gypsy broccoli.     I plant all the vegetables under insect netting for a couple reasons.  I have a horrible rabbit problem - and they can wipe out an entire row of starts in one night.  It will also keep the insects such as the cabbage moth from laying eggs on the plants so I shouldn't have a problem with cabbage worms.    The owner will not allow me to use any pesticides on the property which is fine, I would prefer to grow organic.  

Here are a couple pictures of the starts - the plants in the foreground are broccoli and farther down are celery.   I have never grown celery before so I will be curious to see how it does.    The final picture is 2 full rows and you can see where I tilled the next row to start a 3rd row.


Saturday, January 24, 2015

Herding Ducks

I have been noticing a pair of wild Mallard ducks have been visiting the pond the past week.  I see them every other day.   My corgi was at the farm with me today and corgi's are herding dogs, so she decided she was going to herd the ducks, which means running around the pond and barking at them as they moved from one side of the pond to the other.     Its nice to see wildlife on the pond, but I don't want them to decide to nest in the area.   They will come back to the pond with their babies and the catfish in the pond are very big and will eat the babies with one bite.   I don't want to see that happen even though its mother nature at work, so I have been chasing them off when I am there.  


Planting 2nd Row of Vegetables!

We started planting the 2nd row of vegetables - which are mostly cabbages in that row.    I am covering this row the same way I covered the 1st row.   I am going through this trouble for a couple reasons.   There are a lot of rabbits in the orchard and they can mow an entire row of seedlings down in one night.   The second reason is too keep the cabbage moths from laying their eggs on the plants which will grow into caterpillars which can ravage the plants.  I can't sell heads of cabbage that are full of worm holes.     Duane is tilling additional rows with our corgi - Lucy following him.  Nick from the Riverside Food Coop volunteered to come and help plant and I took him up on that.    He was planting red cabbage seedlings.

Monday, January 5, 2015

A Big ugly white worm in the compost pile - Or that's what I thought.

I was shoveling from my pile of compost to add it to my garden rows when I saw a big ugly worm that was about 8 -9 inches long and wriggling around like worms do then they are uncovered.  I thought it must be some type of tape worm or something so I cut it in half with my shovel and went about my business of planting.  I decided to go back and take a closer look at it.   Both ends looked the same but I noticed some small eyes and a mouth on one end that looked snake like.   I covered it up and went home.  It was bothering me that I may have killed some endangered species or something so decided to look it up.   By searching for snakes in compost pile, I guess they are quite common and they like to lay their eggs in the compost pile.    I discovered it was a western blind snake.  They live underground in burrows and eat termites and ants, so I realized it killed something that was beneficial.     They are common in Southern California, and the Southwest.     They are blind because they are rarely above ground.    Here is a picture of one I found on the internet and sure enough - that is exactly what it looked like.


Harvesting Gladiolus Bulbs

I decided to dig up a couple rows of gladiolus bulbs to see how big they grew over the summer.   I started out with small Size 3 bulbs this springs that are 3/4 to 1 inch in diameter.   Bulbs that are jumbo, size 1, 2, or 3, will all bloom, but the size of the flower stalk will increase with the size of the bulb.   Bigger bulbs will also bloom a little earlier.   I was impressed to see that I have a lot of size one bulbs (1 1/2 to 2 inches in diameter) and some jumbo sizes (2 inches are larger).   This was my first year  on this farm and the soil was ok - but I will improve it with more compost every year so I should be able to grow some really nice glads.    Here are some pictures of the bulbs as I was digging them up and the container with all the harvested bulbs.  Note all the baby bulbs or cormels attached to the bulbs.  I try to grow them also.     I am not sure of the variety as the tags were all stolen by something.  The scrub jays or squirrels are my main suspects.  I will mix them all up and call them mixed colors and work on more permanent signs to mark my varieties this spring.


Rows of Onions

I planted two rows of onion over the past 2-3 weeks.   The rows are 50 foot long and 3 foot wide so I will have a lot of onions.  The irony is that I can't stand onions.  I don't like them raw, cooked, fried, or prepared any way.    But I realize a lot of people do like them, so I planted a whole bunch.    Hopefully, I will be able to sell them.

Here's a picture of the two rows.  They were onion seedlings that I purchased from Dixondale Farms in Texas and some i started from seeds myself.  I ordered the seedlings from Dixondale before I tried growing them from seed and realized its quite easy so I will grow all of the from seed next year.


Planting Brussels Sprouts

I planted 155 Brussels sprouts plants today on my farm.   The variety is Jade Cross.  I have never grown brussels sprouts before so will see how well they grow   They were planted in a 3 foot wide row in flor flow self watering ground cover.  Its a plastic mulch with a low drip line built in with pre punched holes - 3 one each side of the drip line.    The row is 50 feet long, but the brussels sprouts maybe filled 1/3rd of the row.   I then covered the row with insect netting to keep the cabbage worms out and also protect the seedlings from varmints which love to mow down my seedlings as I plant them.   Here are some pictures of the seedlings in the row and finally - covered up.  The white pipes are used to support the netting and give the plants room to grow.


Sunday, January 4, 2015

Planting Daffodils

I received a 1000 mixed daffodil bulbs.   I ordered them from one of my suppliers for $100.00 - which is really a great price.  There were closing out their inventory because most parts of the country are way past daffodil planting time.    I can plant them up until the end of February and they will do fine because of the cool nights in my planting zone in Southern California.  
I amended the soil heavily with compost and some bone meal.  I had to pick out all the Nut Grass rhizomes (see my post on Nut grass war) and then planted the bulbs about 5-6 inches deep and about the same distance apart.  I planted two rows in each raised row.  Since the ground doesn't freeze here,  you can stagger the planting so you will have a continuous blooms.  
Here are pictures of the bulbs,  the rows with bulbs planted and finally - the planted room.  The rows are raised because I flood the furrows between the rows with water from the pond.  


Dutch Iris - sprouting

I have some dutch iris I planted a month ago that are coming up.   Last year I had all of my dutch iris fail.  They sprouted and would start growing then all died.   They were in a raised bed and since it can get to the 70's and 80's during the day in Southern California, I think the raised bed got too warm for them.   They generally will do well in my area because it does get colder in the winter and nights - (35-50  degrees).  I planted these in the ground so hopefully they will do better.  This variety is golden beauty.


Saturday, January 3, 2015

Jack Frost was here last night!

We had a couple nights of light freeze this week.   I woke up this morning to see frost on all my started winter vegetables, but it appears they are surviving.  There have been 3 nights of frost and they are still green.  Some volunteer tomatoes are black and wilted.     Here are some pictures of the plants with frost on the leave.  The soil was also hard and frozen.